If this is your first time using your Keurig coffee maker, you are in for a treat! Keurig machines make some of the best coffee out there, and they can take even the most novice of coffee drinkers and turn them into a coffee snob in their first cup. But before you can get your perfect cup, you need to know the steps for how to use a Keurig.
Don’t worry. It’s fast. Almost as fast as making a Keurig cup, and we will be done in no time.
Step 1: Get Your Keurig Set Up
You researched it, and now you have the top-rated Keurig coffee maker. Here is how to set up your Keurig.
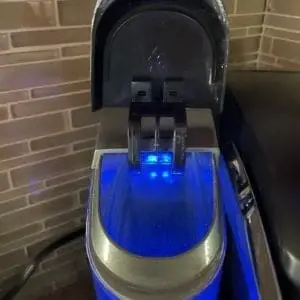
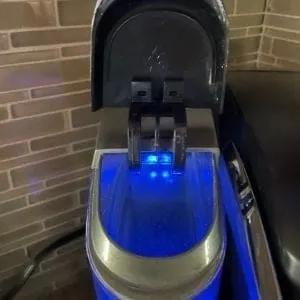
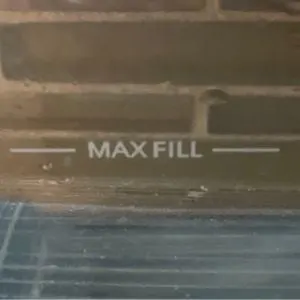
First, remove the water reservoir and fill it up with filtered water to the max fill line marked on the inside of the Keurig model. Don’t skip this step. Filtered water makes a much better cup of coffee than tap water.
If your Keurig has a flap on the lid, you can open it up and pour in water from there.

How to start a Keurig
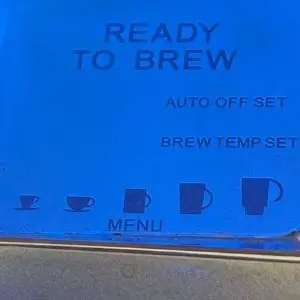
Next, plug in your Keurig and turn it on; the power button may be located at the rear of the machine, so if you can’t see it, reach around to the back to turn it on. The machine will draw in the water from the reservoir and immediately start to heat it.
If you have a larger model, you can set different settings such as water temperature (I leave it at the default 192 degrees Fahrenheit) and cup size, as well as some clock and timer options (auto on and auto off are both handy). Note none of these are needed for you to use your Keurig machine the first time.
Related: Keurig Won’t Turn On? Here’s What To Do Next
Step 2: Clean the machine
Before you have your first K cup pod, it’s a good idea to clean out the machine. We call this the cleansing brew process. To run a cleansing brew, place a mug under the spout and turn the machine on. The water will run through a series of cleaning cycles until it runs clear.
Once you have done a cleansing brew cycle, refill the water reservoir with fresh water (or spring water). Make sure not to fill it past the max fill line, or else you will spill some water from the water reservoir trying to get it back into the coffee machine. Depending on where your Keurig brewer is located, it may be better to have a separate container of water to pour directly into the reservoir rather than removing the reservoir to fill it.
Wait a few minutes for the water to heat up. If you have a display, it will read when ready; other models will have a heating light that goes on when it’s ready to brew. If there is no heating light, you will need to listen for the heating sound to stop, which will indicate you are ready for the next step.
It’s best to use filtered or bottled water in Keurig machines since they have fewer minerals and will prevent you from needing to descale the Keurig more often. However, if you want to use tap water, you can also use the water filter if your Keurig is equipped with one.
Next is time for the Keurig brewing instructions.
Step 3: Add Your Favorite K-Cup

The instructions for operating a Keurig couldn’t be easier.
Open the lid of the Keurig coffee maker and place your K-Cup in the k-cup holder of the machine.
K-Cups and K cup pods are the term for Keurig single brew coffee makers but there are other makes you can use depending on your model.
This sounds simple but if you are used to using another kind of coffee machine, here are a few tips.
Don’t remove the foil lid; this will have loose grounds come back up into your Keurig needle, and you will need to read our article on Keurig needle maintenance before you even get to your first cup.
There’s nothing else you need to do to the coffee pod. Simply pop it into the pod holder and close the lid on top of it.
When you do, you will hear a popping noise. This is the entry and exit needles puncturing the K-cup so that water can flow through it the way it was designed.
Note: Many Keurig coffee machines come with a DIY coffee pod, where you can use your own coffee grounds to make a cup of coffee.
Step 4: Set Your Desired Strength and Size
Your Keurig coffee maker may have settings that allow you to adjust how strong or how small of a cup you want. This can be set before pressing the start button. It was vary depending on the particular model.
There are between 1 to 5 brew strengths on a Keurig machine. They are 6, 8, 10, and depending on your model of Keurig 12 oz. You may have even larger ones if you have a Keurig Duo, but the process is the same.
If you prefer a strong cup of coffee, use the small cup setting; if you prefer a weaker cup of coffee, use a larger brew size.
Step 5: Place your coffee mug under the dispenser
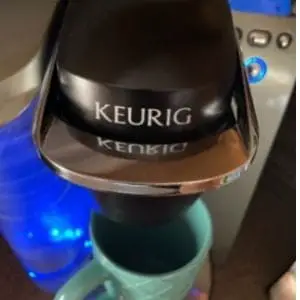

Grab your favorite mug and hold it under the dispenser, or you can leave your mug on the drip tray. The machine will stop dispensing coffee when it has dispensed the amount of coffee you chose.
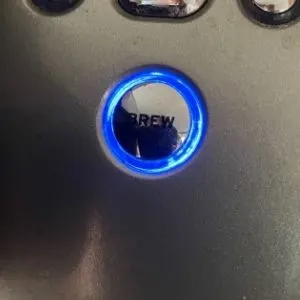
Step 6: Press the Start Button


Press that brew button! Before you do, make sure everything above is done. Don’t skip ahead because that could cause problems.
There is only one brew button on a Keurig, so pressing it must be easy, right? Right!
Just press the big circular start button once, and you are good to go.
Your cup will be done in less than a minute!
That’s right; it only takes one minute for a brew cycle run and for you to get your perfect cup of coffee.

Step 7: All Done!
You are done, well, almost. When your cup is full, the Keurig will stop dispensing coffee so you can pick up your mug and enjoy your perfectly brewed cup.
If you have a larger reservoir, the machine will use that water and begin heating it for the next cup of coffee.
Step 8 Remove the K-Cup and Enjoy Your Fresh Coffee


When your cup is done, you can either sit down and drink it or put it in a Yeti mug and keep it warm all morning.
Ready for another cup? Just repeat the process to make another cup. You can fill the water reservoir after each use or when it gets close to empty. When that happens, it will start flashing lights, and you will know it’s time to fill the water reservoir again.
Just remove the used pod and repeat the above Keurig instructions.
How to use a Keurig FAQ
Do Keurig Coffee Maker Instructions Differ by Model?
While the process for making coffee in a Keurig is practically the same, no matter what model Keurig you have, the instructions on how to do it might be slightly different. This article focuses on how to use a Keurig 2.0, but there are a few other models that may not follow these exact steps and instructions.
What settings do Keurigs have?
Depending on your model, you can also go into the settings of your Keurig and adjust things like the water temperature, default cup size, set the clock, and automatic on and off. This last feature is nice because you can have your Keurig come on 10 minutes before you wake up so that the cool water in the machine has time to heat up. This speeds up the total brewing process for you. Allowing you to get that morning cup of coffee into you quicker.
What do the buttons on the Keurig do?
The buttons on the Keurig coffee maker are pretty straightforward. You have the power button and Keurig brew button along with a menu to select the strength. Depending on your model, you may also have settings like time, temperature, auto start, and how long it takes for the machine to turn off.
How much can the drip tray hold?
The size of the drip tray varies, but as I found out recently, it’s designed to hold a full cup of coffee (12 oz in my case), but if you have a smaller model (K-Slim K-Mini, etc…), there may be no drip tray or the drip tray may hold less.
Why is my Keurig not brewing?
If you have been using your Keurig for a while and it is not brewing, you may need to run a descale or run an empty cycle to make sure water is coming out. If it isn’t, the needle could be plugged. Or there could be a bubble of air in the line, here is what to do when your Keurig is not pumping water.
How do I descale a Keurig?
Over time, minerals from your water can build up inside your Keurig. To clean the inside, you will need to use white vinegar or a Keurig descaling solution. Here is how to descale your Keurig instructions to help you out, and how to reset a descale Keurig warning if the light is not turning off.
Do I need to clean my Keurig?
Yes, over time, coffee residue and oils will build up, and you will need to clean your Keurig, though it’s a lot less than you would a traditional coffee machine.
Is a Keurig easy to use?
Yes! Keurigs are incredibly easy to use. In fact, the first time you use it, you will think, that’s it!?!
Can I make more than one cup at the same time?
Keurigs are designed as a single brew coffee maker, so making more than one cup will require additional k-cup pods and using multiple brew cycle runs.
Can I use ground coffee in a Keurig?
Yes, on certain models. Some Keurigs come with a separate DIY coffee pod that allows you to put your own coffee into the pod.
What are the different Keurig Models?
We’ve reviewed all of the current Keurig coffee makers, so we know a thing or two about Keurig. Here are all the different models reviewed for your reading pleasure, plus the best Keurig coffee makers: